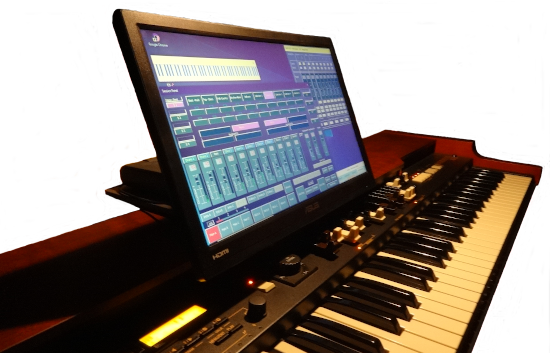
Do it your way
What could be greater than playing an instrument? Striking the right keys at the right time and experiencing the sound - that's the fun.
This is all the more true when playing with auto accompaniment in your band.
However, no backing band only plays chord tones. That's why nimbu assigns chord scales with a minimum of 7 tones to the chords you play. The tensions of the chord scales give your accompaniment the authentic sound of a band.
This way, anyone can play keyboard without the music being restricted. After all, we live in the age of the Internet with new possibilities. Possibilities that did not even exist in the early days of auto accompaniment. As a rule, you know what you want to play. E.g. a certain song. So why not create an accompaniment for exactly this song? There are countless videos on YouTube® that show you how to play certain songs on a keyboard.
Playing your own accompaniments in nimbu is much easier. You only have to play the chords with your left hand. Without rhythm. If you want, without buttons for intro, main etc., just with SyncStop. Your music in nimbu is authentic and is not flattened in any way. In addition, there is the feeling of playing in a real band, because rhythm, all strokes, riffs, bass lines and the tensions absolutely fit.
This playing is even more fun!
When you practice with a song-related accompaniment computed from a MIDI File, nimbu has all the information to support you in keyboard learning. In the structured User Interface you will find many functions that will help you to make progress. Here are some examples (with indication of the tab in the user interface):
Without notes
imbu gets along completely without notes. All the music is displayed on a timeline. In this synchronized display, you can literally see the progress of your music (Edit Tab - Instruments and Tracks). You will automatically learn to read the musical notation over time. If the MIDI file differs from your sheet of music, transpose the whole MIDI import until the melody notes match (MIDI Import Tab - All Tracks - +1 / -1 Semitone).Display of the play position
nimbu shows you the bars and the current position within the bar on a timeline in real time. You can display this playing position in each accompanying instrument and in the melody track (Edit Tab - Instruments and Tracks).Play everything with single-finger automatic or simplified chord fingerings
The single-finger I automatic is very catchy thanks to the fingering of the fundamental plus chord type. The usual limitation to major and minor chords including their seventh chords is practically eliminated by the free definition of two additional chord types per section, so that you can play everything with the single-finger I automatic.nimbu offers you a total of 4 settings for the single-finger automatic in imitation of the systems of different keyboard manufacturers (Control Tab - Playing Chords - Chord Recognition - Single Finger I, Single Finger II, Single Finger III, Smart Chords).
But we would advise you to start with chords from the beginning, because you will learn the correct chord fingering at the same time. But also here nimbu offers you the option to play with simplified three voiced chord fingerings first (Control Tab - Playing Chords - Chord Recognition - 3 voiced).
Display of the chords to be played
But there is more. nimbu shows you on a time axis with time signatures which chord is to be played when (Control Tab - Control via Setup - Event Track). You can see exactly when which chord is coming when you are playing.Setting from which remaining time of notes new chords should no longer be played
Since chords change much less frequently than accompaniment notes, this setting very effectively suppresses retriggering as well as pitch shifting, because played notes are not transposed in the first place. This unique setting can be found in the "Control" tab in the "Playing Chords at the end of a note" group.Display of all chord fingerings
nimbu shows you the fingerings of all resolved chords (Control Tab - Playing Chords - Chord Display). And this is depending on the chord recognition set. If your leadsheets only contain chord symbols, you can look them up here. You can also press the chords or their inversions on the keyboard, and nimbu will immediately show you the chord symbol on the chord display.Graphical display of the keys to be played
Depending on the selected chord recognition, nimbu will show you the keys to play while playing. Also the keys of the melody to be played (Perform Tab - Keyboards - Demo).Practice with slow tempo
You first practice at a lower tempo, which you simply set. If your accompaniment has tempo changes because it was derived from a MIDI file, for example, this setting will still work because nimbu will always make your set tempo relative to the tempo changes of the accompaniment. (Play Tab - Play - Tempo BPM).Practice certain bars
And if it still doesn't succeed at a certain point, you start from a certain bar in order to practise this point (Play Tab - Play - Start at Bar).Display and record the events played
nimbu even draws your played events in real time under the events to be played (Play Tab - Recording and Perform Tab - Practice). While playing, you can see immediately where your attacks are too early or too late, or where you play notes too long. Breaks are also music. You can also analyze this recording after playing.Setting and displaying the fingering
You can also note in nimbu which chords you want to play with which inversion so that it works well with the fingering. The transitions of the chords are then displayed while playing (Perform Tab - Keyboards - Fingering). The display is done on 3 adjacent keyboards for the previous chord, the currently played chord and the next chord.Pre-playing melody and accompaniment
In addition, nimbu plays the melody and accompaniment to you in order to give you an impression of the sound. You should memorize this sound. The aim is to reproduce this sound again when playing alone.To do this, you can first practise the chords and let nimbu play the melody or, conversely, practise the melody while nimbu plays the accompaniment. The sound plays a decisive role. This is how you practise very efficiently.
Instrument setting while playing
You can adjust your instrument setup in real time while nimbu is playing. This way you can hear every change you make immediately (Setup Tab - Instruments).At some point, you won't need all this because you can play. You have done it and you play absolutely freely, putting all your power into the music. What an experience, what fun !
With all Available Tones you will play characteristic, authentic accompaniments even as a beginner. You'll quickly learn how music works, and over time you'll recognize the musicality and sound of a really good accompaniment.
You and your listeners will be amazed at what skills you have. Maybe you will even develop your own ideas or have fun improvising over time.
Learning Keyboard made easy. Here is our offer.
"YouTube" is Registered Trademark of Google LLC, 94043, Mountain View, US
"YouTube" is Registered Trademark of Google LLC, 94043, Mountain View, US


